
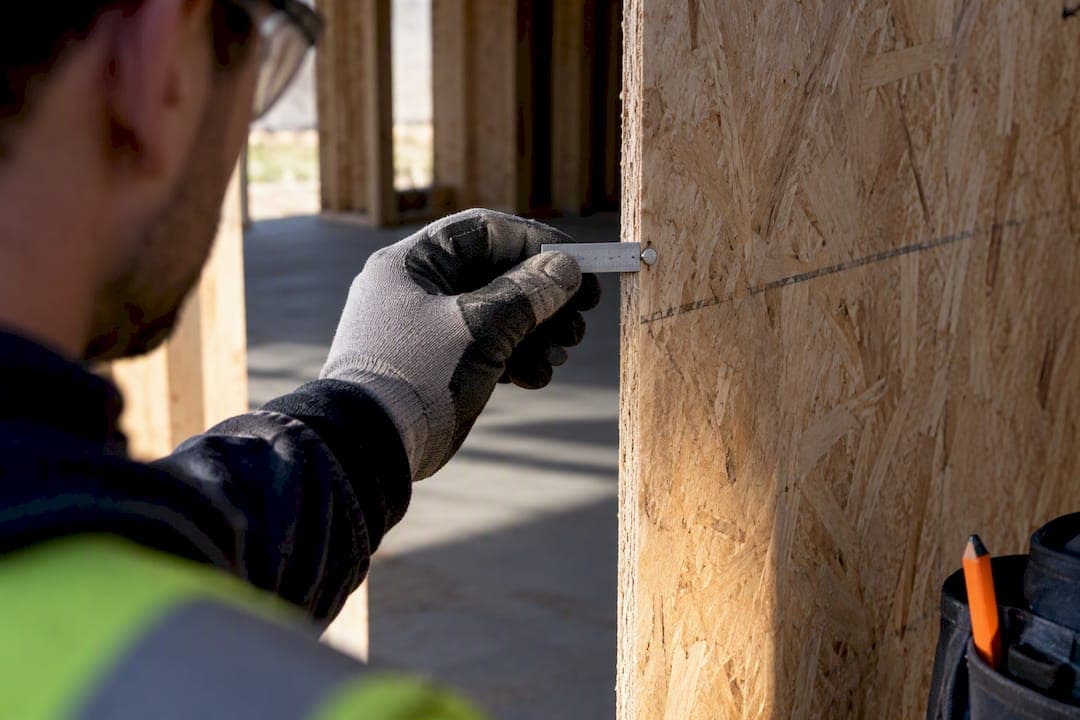
Inspect shear wall nailing before the water-resistive barrier or cladding goes on, and verify nail type, spacing, and the 3/8 inch edge setback against the approved shear wall schedule. Document any overdriven, missed, or mislocated nails immediately and require correction before signing off, since coverings applied later make these defects impossible to verify without demolition.
TL;DR:
- Inspect shear wall nailing before the water-resistive barrier or cladding goes on to verify nail type, spacing, and edge setbacks against the approved shear wall schedule.
- Confirm wall boundaries, panel type, and hold-down locations from the drawings before sampling nails, to avoid approving incorrect nailing patterns.
- Overdriven nails and fasteners that missed framing significantly reduce shear capacity, with overdriving frequently caused by excessive pneumatic nail gun air pressure.
- Measure and record nail spacing at representative locations, check for proper penetration from the stud side, and photograph each finding for comprehensive documentation.
- Repair of nailing defects should prioritize re-nailing missed fasteners or using screws on damaged edges, with any framing modifications approved by an engineer to prevent capacity reduction.
Table of Contents
- Inspection scope and timing: where and when to check shear wall nailing
- Common defects and failure modes: what reduces shear capacity on site
- Measurement and documentation: what to record and how to verify it
- Accepted fixes and field repairs for nailing defects
- Step-by-step inspection checklist for shear wall nailing
- How a focused shear wall report workflow helps inspection coordination
- Field notes on nailing verification and when to escalate
- Alternative: a shear wall report workflow that reduces inspection ambiguity
- Primary codes, checklists, and technical reports to consult
- Sources
- FAQ
Inspection scope and timing: where and when to check shear wall nailing
Nailing verification has to happen while the sheathing is still exposed. Once the water-resistive barrier, cladding, or flashing goes up, boundary and field nailing disappear from view, and there is no practical way to confirm compliance without removing finished work. This is the single most common scheduling mistake on residential jobs: a framing inspection gets requested too late, after a crew has already started house wrap.
The Kitsap County residential sheathing and shearwalls inspection checklist lays out the practical scope: nail type, diameter, spacing, penetration into framing, edge setbacks, and staggered nailing where spacing falls at 3 inches on center or less. Hold-downs, straps, and blocking at panel edges fall inside that same scope, since they work together with the nailing pattern to transfer shear load into the foundation.
Before sampling a single nail, reconcile the drawing's shear wall schedule with what's actually on the wall:
- Locate every wall line the engineer identified as a shear wall on the plans and confirm the panel layout matches.
- Mark shear boundaries in the field with chalk or paint so sampling doesn't drift into non-shear sheathing.
- Cross-check hold-down and strap locations against the schedule before checking nail spacing, since a missing hold-down changes how you read the nailing at that boundary.
- Note panel thickness and grade stamps, since the nailing requirement is tied to both.
Skipping this reconciliation step is how inspectors end up approving nailing that's correct for the wrong wall.
Common defects and failure modes: what reduces shear capacity on site
Most shear wall problems trace back to how the nail was driven, not whether it exists. An APA technical topic on overdriven fasteners explains that overdriven nails reduce shear capacity, and pneumatic clip-head nails driven with too much air pressure are a frequent source of this defect. A nail head that has crushed through the panel face no longer transfers load the way the design assumed.
Watch for these defects during every inspection:
- Overdriven or ruptured fasteners: the nail head has punched through the outer ply, visible as a crushed or torn surface around the nail.
- Missing or shallow penetration: the nail missed the stud entirely or didn't seat into solid framing, often invisible from the sheathing side and only confirmable from the stud side during rough framing.
- Edge nails too close to the panel edge or clustered along a grain line: this causes visible splitting, sometimes hairline, sometimes a clean crack running the length of the board.
- Wrong fastener type: staples or clipped-head nails substituted for the specified common nails, which don't carry the same allowable shear values.
A structural framing analysis from Cal Poly points to fastening failures, bent nails, pull-through, and splitting as the drivers behind most shear wall issues, which is why inspectors should prioritize fastener condition over cosmetic sheathing concerns. Our guide to common shear wall design mistakes covers how these defects often originate upstream, in layout or specification errors, before a nail gun ever touches the wall.
Measurement and documentation: what to record and how to verify it
Sampling every nail on a shear wall isn't practical, but a defensible inspection still needs a consistent method. Pick several representative locations along each shear wall line, prioritizing panel edges, corners, and any wall segment flagged with tighter nailing on the schedule, then measure spacing at each sample point with a tape measure or a simple spacing gauge.
- Measure edge setback directly against the 3/8 inch minimum, since this is a fixed dimension you can check in seconds with a small ruler.
- Verify nail penetration by checking from the stud side wherever framing is still exposed, since a nail that looks fine from the sheathing face can still have missed the stud.
- Check head condition at each sample point for overdriving, ruptured plies, or angled entry.
- Record measured spacing against the schedule value at every sample location, not just a pass or fail note.
- Photograph each finding with a tape measure or reference object in the frame for scale.
Pro Tip: Photograph the panel edge stamp alongside your spacing measurement in the same frame, so a reviewer can confirm panel type and nailing compliance from one image.
Your inspection form should capture the plan reference for that wall line, panel type and thickness, nail type and size, measured spacings at each sample, blocking condition, hold-down presence and condition, and the photos tied to each entry. This level of detail is what lets a permit reviewer sign off without a return site visit, and it's the same set of fields the ATC job aid recommends inspectors track for nailing, spacing, penetration, and hold-down verification.

Accepted fixes and field repairs for nailing defects
Not every nailing defect requires tearing off sheathing. Re-nailing is often acceptable for missed or shallow fasteners, but adding nails into an already-dense pattern can backfire. The APA's guidance on overdriven fasteners warns that over-densifying a repair area can induce splitting and actually reduce capacity rather than restore it.
- Re-nailing missed fasteners: acceptable when new nails land in solid framing without clustering too close to existing nails.
- Screws as an alternative: preferable at damaged panel edges where predrilling avoids further splitting, particularly around an existing overdriven nail.
- Blocking or sistering studs: appropriate when a stud has split or when panel edges fall outside solid framing.
- 3x or doubled framing at panel edges: required where nailing spacing runs tighter than 6 inches on center, since concentrated nailing increases splitting risk in narrow members.
Our design mistakes guide has more on how these repairs interact with the original design intent. Any repair that changes the framing member size, adds a hold-down, or departs from the original schedule needs engineer of record approval before the inspector signs off. A repair that just adds nails without engineering input, especially on a wall with a demand close to its capacity limit, is a common source of disputes that could have been avoided with a quick review call.
Step-by-step inspection checklist for shear wall nailing
A repeatable order keeps the inspection consistent from job to job:
- Pull the approved shear wall schedule and mark shear boundaries on the wall before touching a tape measure.
- Confirm panel type, thickness, and grade stamp against the schedule.
- Sample edge and field nailing at several representative locations, prioritizing corners and high-demand segments.
- Check nail type, size, spacing, edge setback, and staggering where required.
- Inspect hold-downs, straps, and blocking for presence and correct location.
- Record every measurement against the schedule value, not just a pass or fail note.
- Photograph findings with a scale reference in frame.
- Issue corrective instructions where defects appear, or sign off when the wall meets the schedule.
Nailing is the controlling factor in most shear wall performance issues: testing research on fastener spacing and type shows how directly nominal shear capacity tracks with correct nailing, more than with sheathing grade or thickness. That's the reason this checklist puts fasteners ahead of every other item.
How a focused shear wall report workflow helps inspection coordination
A professional shear wall report typically lists the panel schedule, required fastener pattern for each wall line, hold-down forces, and the plan reference tying it all together. When that report, or even just the relevant schedule page, accompanies the inspection form, there's no ambiguity about what pattern the designer intended.
Specialized software can generate that kind of report for 1-story and 2-story wood-framed projects, organizing wall lines, openings, hold-down forces, and transfer straps into a single PDF built for review coordination. When a contractor proposes a borderline repair, asking for the designer's report or project file settles the question of intended nailing faster than a phone call back to the engineer's office.
Field notes on nailing verification and when to escalate
A quick trick: leave one nail slightly proud during rough framing so the inspector can confirm penetration without pulling sheathing, and chalk-mark shear boundaries before sampling to avoid checking the wrong wall. Contractors often push back on re-nailing requests, so keep the ask specific: cite the exact spacing or setback that failed. Escalate to the engineer of record when boundary nailing is repeatedly mislocated, hold-downs are missing, or panel edges show splitting.
— Evalin
Alternative: a shear wall report workflow that reduces inspection ambiguity
A clear PDF schedule cuts down the back-and-forth between inspector, contractor, and engineer, since everyone is reading the same fastener pattern instead of interpreting a hand-marked plan sheet. That's the practical case for using a dedicated shear wall report tool alongside your inspection process rather than relying on markups alone.

Some tools organize wall lines, hold-down forces, transfer straps, and story drift checks into one report built for permit and review coordination on 1-story and 2-story wood-framed projects. For a project involving tested attachment assemblies alongside shear design, it's worth cross-referencing wind-zone specific guidance like this roofing wind zone article when fastening interacts with other code-driven assemblies.
- Try the Three-Report Trial at no cost for three watermarked reports before committing to a plan.
- Subscribe to Professional Monthly for $29 per month or Professional Annual for $250 per year once you need unwatermarked, ongoing report output.
- Review the full shear wall design program page for plan details, or visit ShearWise Pro to see the calculator and report workflow directly.
Sign up to try ShearWise Pro and generate a report for your next project before the next inspection.
Primary codes, checklists, and technical reports to consult
For numeric spacing and fastener tables, go to the IBC wood chapter directly. For a sample field checklist, the Kitsap County checklist and ATC job aid both work well as templates. For failure-mode evidence behind why fastener condition matters so much, the APA technical topic and JLC field guide cover the practical side clearly.
Sources
The nailing pattern on a shear wall is not a suggestion. It's derived from the design shear load and specified in the engineered schedule, but it has to fall within the ranges and minimums set by code. Edge nailing, the fasteners along panel perimeters and at horizontal joints, typically runs 2 to 3 inches on center, tighter than the field nailing across the panel interior, which commonly falls in the 6 to 12 inch on center range. Tighter edge spacing shows up on higher-demand walls, so always check the schedule rather than assuming a default pattern applies everywhere.
Nail size and type matter as much as spacing. Common nail sizes on shear panels are 8d or 10d, and the schedule will specify which. Galvanization affects allowable design values in some tables, so a substitution from bright common nails to galvanized fasteners isn't automatically equivalent unless the schedule or a code table accounts for it.
Edge setback is a fixed, non-negotiable dimension. The IBC 2021 wood chapter requires nails be held back at least 3/8 inch from the edges of wood structural panels and from framing members, and specifies allowable fastener sizes and spacing in its tables. Nails driven too close to an edge split the panel or the framing member, and that split reduces the wall's actual shear strength even if the nail count is correct.
A few points inspectors should carry into every check:
Our nailing schedules guide covers how these patterns get derived from design load if you need the engineering side of the picture, and our sheathing code guide walks through panel type and thickness requirements in more depth.
FAQ
What is the recommended nailing schedule for shear walls?
Nailing schedules vary by design shear demand, but edge nailing commonly runs 2 to 3 inches on center while field nailing runs 6 to 12 inches on center, using 8d or 10d common nails held back at least 3/8 inch from panel and framing edges. The exact pattern for a given wall always comes from the engineered shear wall schedule on the approved plans, not a generic default.
What's the worst thing a home inspector can find?
For shear wall work specifically, the most serious finding is boundary nailing that doesn't match the engineered schedule combined with a missing or mislocated hold-down, since both directly reduce the wall's ability to transfer lateral load. Overdriven fasteners and split panel edges are close behind, because they're easy to miss once cladding goes on and hard to correct without opening the wall back up.
What are the code requirements for shear walls?
Shear wall requirements come from IBC and IRC tables for fastener size and spacing, cross-referenced with the AWC SDPWS for allowable design values and material notes. Every shear wall also needs an engineered schedule specific to the project, since the code tables set minimums and maximums rather than a single universal pattern.
How much does a draw inspection cost?
Draw inspection costs vary by inspector, region, and project scope, and this article does not have pricing data for that service. For shear wall design and reporting specifically, ShearWise Pro's Professional Monthly plan runs $29 per month, with a free three-report trial available for professionals evaluating the workflow.