
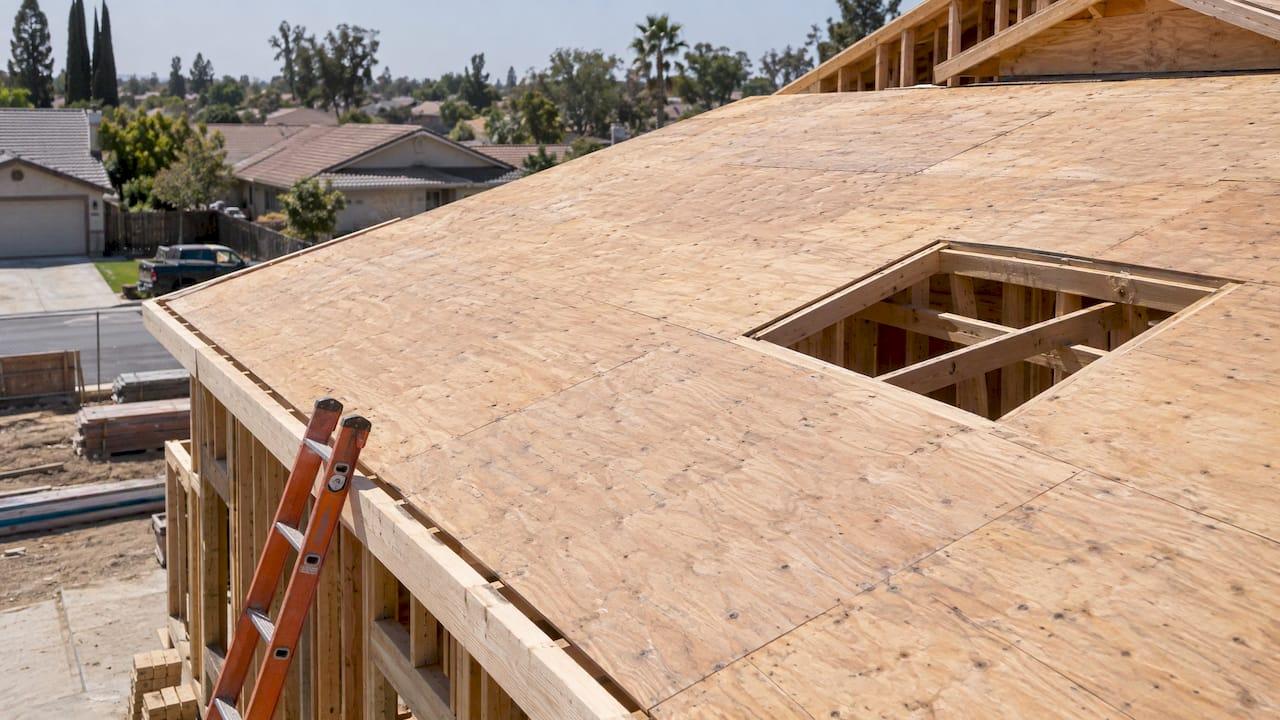
Roof information for lateral design is the set of roof facts that decides how wind and seismic forces travel from the roof into your shear walls: framing and sheathing, roof shape and dimensions, openings, edge members, and the connections to the walls below. If you collect these inputs once, in a consistent order, the wall lines, hold-downs and transfer straps downstream follow from them. In ShearWise Pro, roof information is one of the organized inputs next to wall lines, openings, full-height segments and story drift checks, so it is entered once and carried into the PDF report.
This guide is for engineers, designers, drafters and builders working on 1- and 2-story wood-framed projects in California, Oregon, Nevada and the Bakersfield area.
TL;DR
- The roof acts as a horizontal diaphragm. It collects lateral load and distributes it to the shear walls as part of the load path.
- Collect roof geometry, sheathing and nailing, openings, chords, drag struts and roof-to-wall connections before you size any wall line.
- Openings such as skylights and stairwells need special detailing to move forces around them, so record their size and location early.
- California's 2025 residential code requires a continuous load path from the roof to the foundation as of January 1, 2026.
- A short, repeatable roof input checklist keeps your calculations and review package consistent.
Table of Contents
- Why the roof matters in lateral design
- The roof information to collect
- How roof forces reach the foundation
- A small worked example
- Roof conditions that complicate the design
- Code context for California, Oregon and Nevada
- A roof input checklist you can reuse
- How ShearWise Pro handles roof information
- Start with a three-report trial
- Our perspective
- FAQ
- Sources
Why the roof matters in lateral design
Lateral forces act parallel to the ground. In wood buildings they come mainly from wind and earthquakes. Wind pushes on the walls and the load reaches the roof, while earthquake forces are generated by the building's own mass accelerating during ground motion. That guide also notes that lateral loads are less intuitive than gravity loads, which is why a roof that looks simple on the plans still deserves a clear set of inputs.
The roof matters because it is usually the first horizontal element in the load path. Wind or seismic load arrives at the roof plane, the roof diaphragm carries it sideways, and the shear walls take it down. NIST describes diaphragms as elements that transmit seismic forces horizontally from their point of origin to vertical elements. They also tie the vertical elements together so the building responds to lateral loads as a three-dimensional system rather than as separate walls.
For a 1-story building, the roof is the only diaphragm. For a 2-story building, the roof is the top one and the second floor is another. In both cases, the quality of the roof inputs sets the quality of every shear wall result below it.

The roof information to collect
Every project is different, but the same groups of data come up each time. Gather them before you open the calculation, not while you are in the middle of it.
Roof geometry and dimensions
- Overall plan dimensions of the roof diaphragm in each direction.
- Roof shape: gable, hip, shed, or a combination, and where the ridges and valleys fall.
- Plan offsets, re-entrant corners and steps in the roof plane.
- Eave and overhang dimensions, which matter for wind tributary area.
- Roof pitch, which you also need for wind pressure and for geometry-dependent loads.
- Mean roof height and the wall heights below the roof.
Write down which direction each dimension refers to. Wall lines are checked in two orthogonal directions, and a diaphragm that is 30 ft in one direction and 50 ft in the other has a different span and depth for each.
Framing and sheathing
The framing and sheathing define what the diaphragm can carry. Record:
- Rafter or truss type and spacing.
- Sheathing type and thickness.
- Nail size and spacing at panel edges, at boundaries and in the field.
- Whether panel edges are blocked, and the layout of the panels.
The APA guide on diaphragms and shear walls covers diaphragm design for wind and seismic loading, wood structural panel roof diaphragms, diaphragm deflection and subdiaphragm design. It is a good reference for what these inputs feed into.
Openings in the roof plane
List every skylight, chimney, roof hatch, attic access, and any stair or double-height space that interrupts the diaphragm. NIST notes that diaphragms with openings such as stairwells and skylights require special detailing to transfer forces around them. For each opening, record its width, length, position relative to the diaphragm edges and the nearest wall line.
Large openings make force transfer a framing question as well as a calculation question. A short read on how roofs and skylights are approached gives useful context on the roofing side of those openings when you coordinate with the trades.
Edge members, chords and drag struts
Chords are the diaphragm edge members that resist bending stresses. Drag struts, also called collectors, distribute diaphragm shear between shear-resisting elements. Note which framing members, such as top plates or ledgers, serve as chords and struts, and whether they are continuous across the lengths you need. Splices matter. A chord that is not continuous has to carry force through a connection, and that connection must be detailed. Our guide on diaphragm chords in lateral design goes through the details.
Roof-to-wall connections
Record how the roof connects to each wall line: toe-nailing, framing clips, blocking, straps or continuous ties. Also record where the roof framing runs parallel to a wall and where it bears on it, because that changes how the diaphragm shear gets into the wall top plate. We cover this in roof diaphragm connection: load path, details and checks.
How roof forces reach the foundation
Think of the path as a chain. If one link is missing from your inputs, you cannot show that the chain is complete.
- Load enters the roof. Wind on the walls and roof surfaces, and the seismic mass of the roof and upper walls.
- The diaphragm collects and distributes it. Sheathing carries shear. Chords carry the bending-type forces at the edges.
- Collectors bring it to the walls. Drag struts carry force along the diaphragm to the shear wall that will resist it.
- Roof-to-wall connections transfer shear. The connection must carry the same unit shear the diaphragm delivers.
- Shear walls resist it. Sheathing and nailing on each wall line, with openings and full-height segments considered.
- Hold-downs and anchorage resist overturning and uplift. They tie the wall to the story below or to the foundation.
- The foundation takes it into the soil.
NIST states that diaphragms connect to vertical elements to provide a complete load path through the building to the foundation and supporting soils. The same document points out that when vertical elements in stories above and below are not aligned, transfer forces through the diaphragm can significantly add to the diaphragm's seismic demand. In a 2-story house, an upper wall that does not stack over a lower wall is the typical case. Capture the offset in your roof and floor information so transfer straps and the transfer diaphragm are not forgotten.
A small worked example
The numbers below are hypothetical and only show the arithmetic. They are not a design.
Take a rectangular roof diaphragm 50 ft long and 30 ft deep, loaded in the long direction with a uniform lateral load of 200 plf along the 50 ft length. The load is carried to two shear wall lines at the ends, each 30 ft long.
- Reaction at each end wall: 200 plf × 50 ft ÷ 2 = 5,000 lb.
- Unit shear into each wall line: 5,000 lb ÷ 30 ft = about 167 plf.
- Maximum diaphragm moment: 200 plf × (50 ft)² ÷ 8 = 62,500 lb-ft.
- Chord force: 62,500 lb-ft ÷ 30 ft depth = about 2,083 lb in each chord.
Two things follow. The unit shear of 167 plf sets the sheathing and nailing at the diaphragm boundary and the roof-to-wall connection. The 2,083 lb chord force sets the splice and continuity requirement for the edge member. If a skylight or stair opening sits near the middle of the 30 ft depth, it reduces the effective diaphragm depth at that location, and the numbers change. That is why openings go in the input list from the beginning. For a full 8-step method, see our roof diaphragm design worked example.
Roof conditions that complicate the design
Flexible or rigid diaphragm assumptions
Diaphragms can be idealized as flexible or rigid, and their relative stiffness affects how they distribute lateral loads to the walls. Decide the assumption you are using, state it in your calculation, and keep it consistent with how you distribute load to each wall line. Our lateral load distribution guide explains what sets each wall's share.
Torsion and flexibility
NIST notes that diaphragm flexibility can reduce the ability to transfer torsional forces effectively. Irregular plans, walls concentrated on one side, and large garage openings are the usual triggers. Record the plan layout so you can see the imbalance before you finish the design.
Discontinuities and offsets
Re-entrant corners, steps in the roof plane, and upper walls that do not stack over lower walls all disturb the load path. Note them on the roof plan with dimensions. Each one is a place where a chord, collector or transfer strap may be needed.
Uplift
Wind creates uplift on the roof as well as sideways load. The 2025 California Residential Code, section R301.2.1, calls for a continuous load path to transmit wind uplift forces from the roof assembly to the foundation. Record roof-to-wall tie details so uplift and lateral connections are checked together.
Code context for California, Oregon and Nevada
Code adoption is local, so confirm the edition with the jurisdiction on every project. A few points from official sources:
- The 2025 California Residential Code, section R301, requires buildings to support all loads, including seismic and wind, through a complete continuous load path to the foundation, effective January 1, 2026.
- The City of Bakersfield adopted the 2025 California Building Code by reference, as modified and amended by its municipal code.
- Nevada County, California, publishes its design criteria: residential structures follow the 2025 CRC, wind design follows ASCE 7-22, and the whole county is in Seismic Design Category D. This is a California county, so it is not a statement about the state of Nevada.
For projects in Oregon, the state of Nevada, or any other California city, check the local building department's current adopted code, wind speed and seismic design category before you finalize roof inputs. Record the wind and seismic basis at the top of your calculation so the reviewer sees it immediately.
A roof input checklist you can reuse
Use this list at the start of each project.
- Code edition, wind basis and seismic design category from the local jurisdiction.
- Roof plan with overall dimensions in both directions.
- Roof shape, pitch, mean height and overhangs.
- Framing type and spacing.
- Sheathing type, thickness, nailing and blocking.
- Every opening, with size and location.
- Chord and drag strut members, with splice locations.
- Roof-to-wall connection at each wall line.
- Upper walls that do not stack over lower walls.
- Diaphragm assumption (flexible or rigid) and where it is stated.
If the list is complete, the wall line, opening, hold-down and strap work is mostly a matter of applying it. If an item is missing, it usually surfaces later as a plan-check comment. Our overview of common errors in lateral load design lists the typical ones.
How ShearWise Pro handles roof information
ShearWise Pro is a shear wall calculator and report platform built for 1- and 2-story wood buildings. It organizes shear wall calculations, wall lines, openings, full-height segments, hold-down forces, transfer straps, roof information and story drift checks in one project, and exports clean PDF reports for review coordination. Because the roof information sits next to the wall lines it affects, you can work through a project in one place instead of moving numbers between files.
The platform is a focused workflow for residential 1- and 2-story wood buildings rather than general-purpose structural software, with an emphasis on ease of use, fast report generation, project organization and reviewer-friendly PDF output. You can see the output in the sample calculations PDF, and read more on the shear wall software page.

Start with a three-report trial
The Three-Report Trial costs $0 and includes three watermarked reports, so you can run real roof, wall line and opening inputs through a project and look at the PDF. After the trial, Professional Monthly is $29 per month and Professional Annual is $250 per year. All plans are listed on the ShearWise Pro plans page, and you can sign up to try ShearWise directly.

If you are a designer or engineer who wants a repeatable workflow for the residential projects you submit in California, Oregon or Nevada, run your next 1- or 2-story project through the trial and compare the report with your current package.
Our perspective
Roof information is the part of lateral design that gets entered fastest and checked last. A roof plan looks simple, so the diaphragm gets treated as a given, and the effort goes into the walls. Then a reviewer asks where the chord splices are, how force gets around the skylight, or how the roof ties to a wall that does not stack over the one below.
We built ShearWise Pro around that workflow for residential 1- and 2-story wood buildings. Roof information, wall lines, openings, full-height segments, hold-downs, transfer straps and story drift checks live in one project, and the PDF report is organized for the person reading it. Our view is that a focused tool, made for this building type, lets you spend your time on judgment calls such as the diaphragm assumption and the load path, rather than on assembling the package.
If you do this work every week, a consistent input order and a consistent report are worth more than another feature. That is what we aim to give you.
Evalin
FAQ
What roof information do I need before starting a shear wall calculation?
You need the roof plan dimensions, shape and pitch, framing and sheathing with nailing, every roof opening, the members acting as chords and drag struts, and the roof-to-wall connections at each wall line. You also need the wind basis and seismic design category from the local jurisdiction. With these in hand, the wall line work is much faster.
What does the roof diaphragm do in a wood-framed house?
It collects lateral load from wind or earthquake and distributes it to the shear walls as part of the load path. It also ties the walls together so the building behaves as one system. In a 2-story house, the second floor acts as another diaphragm below the roof.
How do skylights and other roof openings affect lateral design?
Openings interrupt the diaphragm, so forces have to be transferred around them with special detailing. Record each opening's size and position early, and check whether it reduces the effective diaphragm depth near a chord or collector. Large openings near a wall line deserve the most attention.
Does Bakersfield use the 2025 California Building Code?
The City of Bakersfield adopted the 2025 California Building Code by reference, as modified and amended by its municipal code. The California Residential Code section on load path took effect January 1, 2026. Confirm any local amendments with the Bakersfield building department for your project.
Can I try ShearWise Pro before paying?
Yes. The Three-Report Trial is $0 and includes three watermarked reports. After that, paid access is $29 per month or $250 per year.
Sources
- Design Guide: Introduction to Lateral Design
- Diaphragm Systems, APA handout
- Seismic Design of Wood Light-Frame Structural Diaphragm Systems, NIST
- Diaphragms and Shear Walls Design and Construction Guide, APA
- Lateral Force Resisting Systems, SEAOO
- R301 Design Criteria, 2025 California Residential Code
- Bakersfield Municipal Code 15.05.010 Adoption
- Building Codes and Design Criteria, Nevada County, California
- Roofs and Skylights: a Comprehensive Approach