
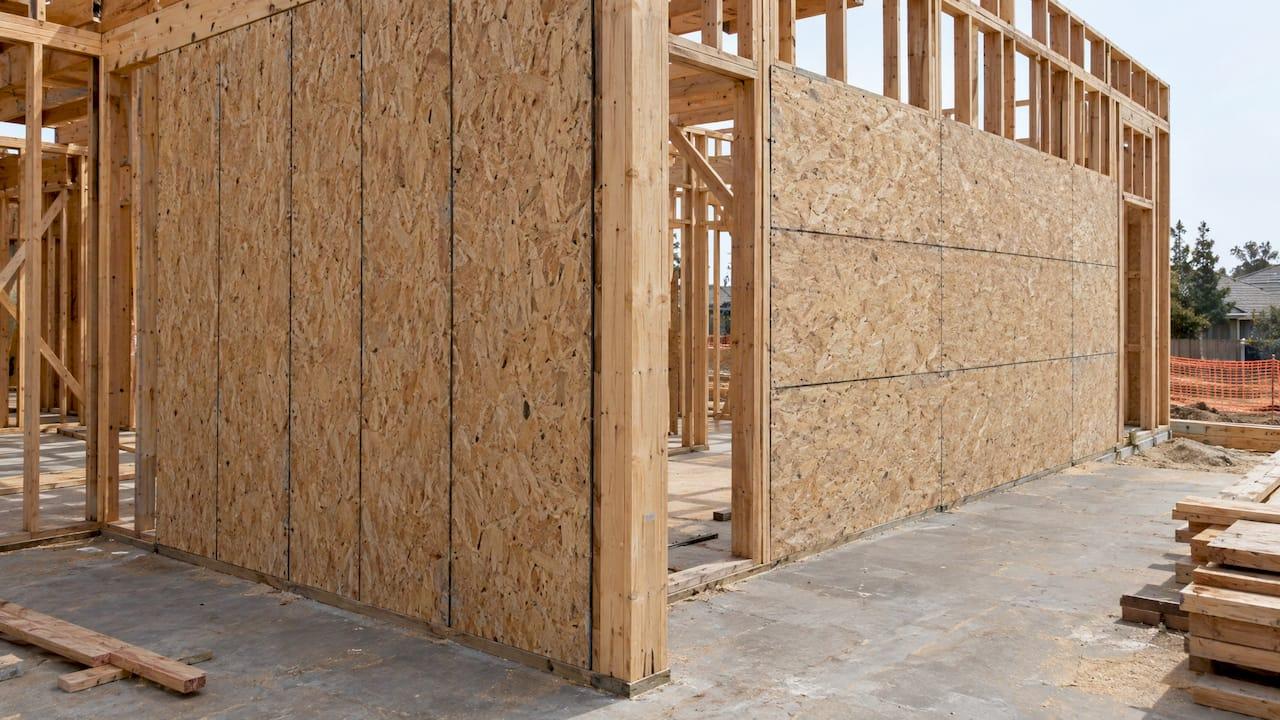
You can run wood structural panel sheathing either vertically or horizontally on a shear wall. Orientation does not change the in-plane shear capacity. What changes is the blocking, the nailing layout and how clearly your drawings and calculations show it. For 1-story and 2-story wood-framed work in California, Oregon and Nevada, the questions that matter are which joints need blocking, what the nail schedule is, and whether the report you send to the plan checker states the layout. ShearWise Pro organizes wall lines, openings, full-height segments, hold-down forces and PDF reports so the sheathing layout you choose is documented in one place.
TL;DR
- Plywood and OSB wall sheathing may be installed with the strength axis horizontal or vertical. APA states that racking resistance and shear wall lateral capacity for wind and seismic loading are not affected by the choice.
- Panel edges must be fastened to framing or blocked unless the wall is designed as an unblocked shear wall. Horizontal joints are where the extra blocking appears.
- Thicker panels do not add shear capacity once fasteners control. Higher unit shears call for 3x framing and tighter nailing.
- Orientation is a detail the drawings and calculations should state. Confirm the adopted code edition with your local building department.
Table of Contents
- What the code says about orientation
- Vertical vs. horizontal: a practical comparison
- Blocking: the part that actually changes
- Staggered panels: no design credit
- Thickness, nails and framing at higher shears
- Openings and full-height segments
- What to check for California, Oregon and Nevada projects
- Perspective
- Document the layout with ShearWise Pro
- A short layout checklist
- FAQ
- Sources
What the code says about orientation
The model codes treat both orientations as acceptable. APA's guidance on wall sheathing axis notes that Table 2308.6.3(3) of the 2018 and 2021 IBC and Table R602.3(3) of the 2018 and 2021 IRC allow wood structural panel wall sheathing to be applied either perpendicular or parallel to supports. The same APA article says the racking resistance of the wall bracing panel is not affected by which way the long axis runs.
The tabulated shear values for wood structural panel shear walls say the same thing in a footnote. The IBC shear wall table as published on UpCodes requires panel edges to be backed with 2-inch nominal or wider framing and allows panels to be installed horizontally or vertically.
The reason is simple. In a shear wall, the load is carried by the nails around the perimeter of each panel, not by the panel spanning between studs. West Fraser explains that the confusion usually comes from deflection rules for roofs and floors. In walls, it is seldom deflection between studs that controls the design. Shear values matter more.
There is one orientation effect to know about. APA notes that when the strength axis is vertical, the wall's capacity for wind loads acting perpendicular to the wall may be lower than with the strength axis horizontal. That is an out-of-plane check on the wall. It is separate from the in-plane shear capacity you use in a shear wall calculation.

Vertical vs. horizontal: a practical comparison
Since capacity is the same, the choice comes down to framing, blocking and field efficiency.
| Factor | Vertical (strength axis along studs) | Horizontal (strength axis across studs) |
|---|---|---|
| In-plane shear capacity | Same tabulated value | Same tabulated value |
| Vertical panel joints | Land over and are nailed to common studs | Land over and are nailed to common studs |
| Horizontal panel joints | None on a wall as tall as the panel | One or more per wall height; need common blocking |
| Blocking required | Fewer pieces, mostly at tall-wall splices or opening edges | Blocking at each horizontal joint |
| Out-of-plane wind (strength axis) | May be lower than horizontal, per APA | Higher than vertical, per APA |
| Typical use | Full-height panels on 8 ft to 10 ft walls | 4x8 sheets on walls where crews prefer them or panel length is limiting |
Treat the table as a planning aid. The adopted code and your engineer of record decide the final detail.
A worked example: 8-foot wall, 4x8 panels
Take an 8 ft wall with studs at 16 inches on center and 4x8 panels.
- Vertical: each panel runs the full wall height. The only joints are vertical, every 4 ft, and each lands on a stud. No horizontal joint exists, so no horizontal blocking is needed for panel edges.
- Horizontal: two courses of panels stack on the wall. That creates one horizontal joint at 4 ft. The IRC requires that joint to sit over common blocking at least 1½ inches thick. The IRC panel joint provision lists the blocking requirement and its exceptions for braced wall panels.
On a 9 ft or 10 ft wall, the vertical layout needs longer panels or a splice. The horizontal layout adds a joint or a rip. Either way, count the joints and the blocking at the layout stage, not after the framers are on site.
Blocking: the part that actually changes
The rule that catches people is not about orientation. It is about edges. WoodWorks explains that in a blocked shear wall, all panel edges must be fastened to a common framing member. Those members are usually studs and horizontal blocking between studs, per Section 4.3.6 of the AWC Special Design Provisions for Wind and Seismic (SDPWS).
A few points save time:
- Vertical joints go over studs. The IRC states vertical joints in panel sheathing occur over and are fastened to common studs.
- Horizontal joints need common blocking in braced wall panels, with listed exceptions. APA notes that blocking may be omitted where the bracing length is at least twice the minimum required.
- Blocking does not have to match the stud depth. A 2021 WoodWorks article on panel edge blocking says it can be narrower than the studs (2x4 blocking in a 2x6 wall) or turned 90 degrees. It must still be 2x nominal or greater, and the edge nails must get the minimum penetration into it per SDPWS Table 4.3A.
- Unblocked walls are a separate design. If you want to leave edges unblocked, the wall has to be designed as an unblocked shear wall, with its own reduced values.
The code history explains why older details vary. APA's blocking history shows the 2006 IRC saying horizontal-joint blocking was not required, then the 2009 and later editions requiring blocking over 1½-inch common blocking with exceptions. If you are working from an older detail library, check it against the edition your jurisdiction has adopted.
For the design side of this choice, our guides on blocked vs. unblocked shear walls and the role of blocking panels in shear walls go through the effect on design values.
Staggered panels: no design credit
Some framers stagger vertical panels, a 4 ft panel at the bottom, then an 8 ft panel next to it, and so on, so that horizontal joints do not line up. APA explains in its staggered shear wall sheathing article that staggering the panel ends in the direction of load should improve diaphragm performance. It also says there is no way to take credit for this, because the published design values assume horizontal joints that are not staggered. Stagger if it helps the crew. Do not increase the unit shear in your calculation because of it.
Thickness, nails and framing at higher shears
Orientation is rarely what limits a wall. Fastening is.
- Thickness. APA's shear wall guidance says increasing panel thickness beyond the table minimum does not raise shear capacity. Fasteners control for Structural I panels thicker than 15/32 inch. To use greater strength, use 3x or 4x framing and multiple fastener lines, such as those in AWC 2021 SDPWS Table 4.2B. Our wall sheathing thickness guide covers the minimums.
- Framing at high unit shear. In Seismic Design Category D, E or F, where shear design values exceed 350 pounds per linear foot, the code table notes require the framing that receives edge nails from abutting panels to be a single 3-inch nominal member or two 2-inch members fastened together. Joint and sill plate nailing is staggered at all panel edges.
- Nail spacing. In the APA technical note on force transfer around openings, sheathing is installed with 10d common nails or smaller. Maximum spacing is 6 inches at panel perimeter and 12 inches in the field. The spacing may be reduced to 2 inches at the perimeter and 3 inches in the field.
This matters for orientation because 3x edge framing and tight nailing change which joints are practical. A horizontal layout with 2-inch perimeter spacing puts a lot of nails into the blocking. Check the schedule against the framing before you commit to a layout. Our nailing schedule guide walks through it.
Openings and full-height segments
Sheathing orientation interacts with openings, because the wall segments beside doors and windows carry the shear. The Structure magazine article on wood-framed shear walls describes the three methods in SDPWS:
- Individual full-height wall segments, the traditional approach.
- Perforated shear walls, an empirical method based on the percentage of full-height segments next to openings.
- Force transfer shear walls (FTAO), which use the sheathed areas above and below openings.
For FTAO, the APA note gives aspect ratio limits. The h/bs ratio is limited to 2:1 without adjustment. Between 2:1 and 3.5:1 the nominal shear capacity is multiplied by 1.25 − 0.125(h/bs). Piers above 3.5:1 are not counted as part of the force-transfer wall.
In practice, vertical panels beside openings can run full height with no horizontal joint, which keeps the segment simple to detail and to check. With horizontal panels, make sure the blocking lines up through the segment and that the joint above or below the opening does not interrupt the load path you assumed. For more on layout, see our guide to reducing hold-downs in wood shear wall design.

What to check for California, Oregon and Nevada projects
Orientation rules come from the IBC, the IRC and SDPWS, and each state adopts and amends them on its own schedule. Local jurisdictions can add their own amendments. We do not list adopted editions here because they change. Before you finalize a layout:
- Ask the building department in the city or county (Bakersfield and Kern County, for example) which code edition and local amendments apply to your permit.
- Check the seismic design category and wind exposure for the site. Higher seismic categories trigger the 3x framing and staggered nailing rules above.
- Confirm whether the project is under the IRC braced wall provisions or an engineered design. Our IRC braced wall method guide explains the prescriptive path.
- Put the orientation, the blocking and the nail schedule on the plans, and make the calculations match them.
Plan checkers return the same comments repeatedly: panel edges not shown as blocked, nailing that does not match the calculation, and a hold-down force that does not trace to a wall line. Our list of common shear wall design mistakes covers them.
Perspective
Most orientation arguments we hear are really documentation problems. The code allows both layouts. What slows a permit is a set of drawings that shows one orientation, a calculation that assumes another, and blocking that appears in neither.
That is why we built ShearWise Pro around 1-story and 2-story wood buildings instead of a general-purpose structural package. Wall lines, openings, full-height segments, hold-down forces, transfer straps, roof information and story drift checks sit in one project, and the PDF report comes out of that same data. When the layout changes from horizontal to vertical, the report changes with it.
Our workflow emphasizes ease of use, fast report generation, project organization and reviewer-friendly output. For a designer or builder in California, Oregon or Nevada, that means less time reformatting calculations and more time on the layout decisions that matter.
Evalin
Document the layout with ShearWise Pro
ShearWise Pro is an online shear wall calculator and report platform for engineers, architects, designers, drafters, contractors and builders working on 1-story and 2-story wood-framed projects. You enter the wall lines, openings and full-height segments, review hold-down forces and transfer straps, and export a PDF report for permit and review coordination.
The Professional Monthly plan is $29 per month. Professional Annual is $250 per year. The three-report trial is free, and its reports are watermarked. See the plans and pricing, or sign up to try ShearWise.

If you want to see the calculation format before you start, the validation library has worked examples. Our structural calculator guide explains how the inputs fit together.
A short layout checklist
- Choose the orientation for the framing: vertical for full-height panels, horizontal where panel length or crew practice favors it.
- List every panel joint. Vertical joints land on studs. Horizontal joints land on blocking of 2x nominal or greater.
- Check the unit shear against the 350 plf threshold and the seismic design category to see if 3x edge framing is needed.
- Set the nail schedule (perimeter and field spacing) and confirm that nail penetration into blocking is met.
- Check openings: full-height segment widths, aspect ratios, and which design method applies.
- Confirm the out-of-plane wind check if the strength axis is vertical.
- Put the layout on the plans and in the report, so reviewer and builder see the same wall.
FAQ
Can I install shear wall sheathing vertically?
Yes. The IBC and IRC allow wood structural panel sheathing to be applied parallel or perpendicular to the studs, and the published shear values allow either direction. APA states that the lateral capacity of the shear wall is not affected by orientation. Edges still have to be nailed to framing or blocking.
Do I need blocking with vertical sheathing?
Vertical joints fall on studs, so a standard wall as tall as the panel has no horizontal joint to block. SDPWS still expects panel edges to be on common framing in a blocked wall, so any horizontal splice, panel end or edge at an opening needs blocking or framing behind it. Unblocked walls are designed separately with reduced values.
Does sheathing orientation change the nailing?
Not by itself. The nail size and spacing come from the shear wall assembly you select, and the unit shear determines them. Horizontal layouts do put more nails into blocking, so check the penetration requirement in SDPWS Table 4.3A for that blocking.
Does thicker sheathing make a shear wall stronger?
Not once fasteners control. APA says panel thickness beyond the table minimum does not increase shear capacity. Using greater strength means 3x or 4x framing and multiple fastener lines.
Sources
- APA: Wall Sheathing Axis
- APA: Staggered Shear Wall Sheathing
- APA: IRC Blocking Provisions
- APA: Shear Walls and Diaphragms
- APA: Design for Force Transfer Around Openings
- West Fraser: Installing Longer Wall Panels Vertically
- UpCodes: Panel Joints (IRC R602.10.4.4)
- UpCodes: Wood-Frame Shear Walls
- WoodWorks: Requirements for Blocking/Bracing in Light-Frame Walls
- WoodWorks: Requirements for Shear Wall Blocking at Panel Edges
- Structure magazine: Wood-Framed Shear Walls